How to cut LED stripsUpdated 3 months ago
Cutting LED strips is a fundamental skill for customizing the length to fit specific project requirements. It's a straightforward process but requires precision to ensure the functionality of the strip isn't compromised. This guide will walk you through the steps to cut LED strips accurately and safely.
You can watch our video, or read on for the text version.
Understanding LED strips
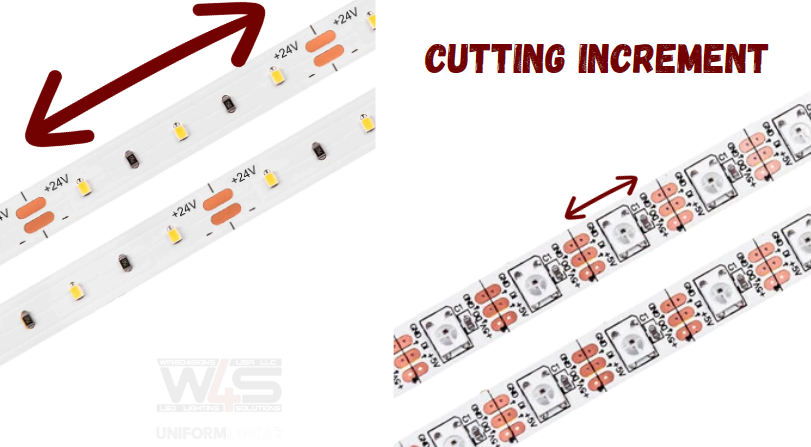
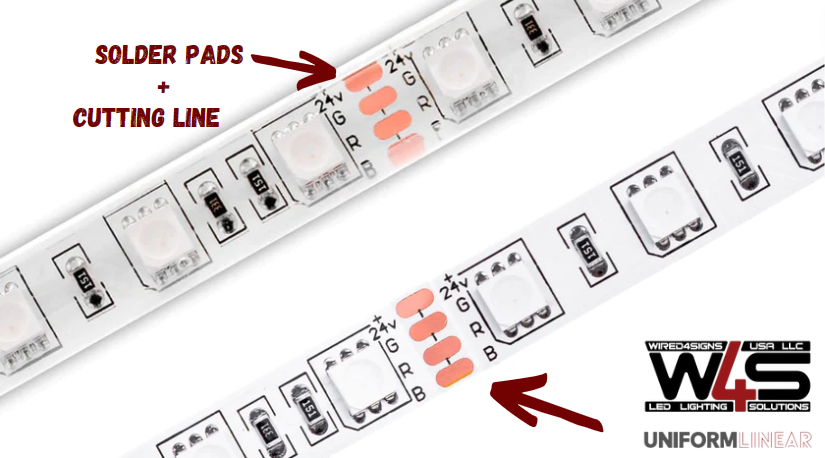
LED strips are designed with specific cutting points, typically marked with a line and scissor icon. These are the only places where the strip should be cut, to avoid damaging the circuitry.
Materials needed
- LED strip
- Scissors or a sharp knife
- Measuring tape or ruler
Steps for cutting LED strips
Measure the length:
- Determine the exact length required for your project.
- Use a measuring tape or ruler to find the nearest cutting point on the LED strip that corresponds to your measurement.


Make a clean cut:
Use a sharp pair of scissors or a sharp knife to make a straight, clean cut along the designated cutting line. It's crucial to cut as straight as possible to ensure a proper connection if you plan to connect the strip to another segment or a power source.
Check the strip:
After cutting, inspect the strip to ensure it's cleanly cut and that no copper pads are damaged. Damaged pads can cause connection issues.
Tips for successful cutting
Use the right tools: Sharp scissors or a sharp knife are essential for a clean cut. Avoid using blunt tools, as they can damage the strip.
Measure twice, cut once: Double-check your measurements before cutting to avoid wasting material.
Cut at the correct angle: Always cut perpendicular to the strip. Angled cuts can damage the circuitry and LED components.
Have adequate workspace lighting: Ensure you have adequate lighting in your workspace to clearly see the cutting points and avoid any mistakes.
After cutting
Connecting: If you plan to connect the cut strip to another strip or power source, you may need to solder or use connectors.
Sealing: Cutting waterproof strip will make it no longer waterproof. Seal the cut end of the strip with silicone or a suitable sealant to protect against moisture ingress.
Conclusion
Cutting LED strips is a simple yet essential process in many lighting projects. By carefully measuring and cutting at the designated points, you can customize the length of your LED strips without compromising their functionality. Always remember to work carefully and precisely to ensure the best results for your lighting installation.